Connecting your iPhone to a printer can significantly boost your productivity, enabling you to print documents, photos, and more directly from your device. This detailed guide will walk you through several methods on how to add printer on iPhone, ensuring a smooth and efficient setup process. We’ll cover AirPrint, Bluetooth, Wi-Fi Direct, NFC, and USB connections.
Method 1: AirPrint
What is AirPrint?
AirPrint is a newly launched Apple technology, through which you can print wirelessly from your iPhone, iPad, or iPod touch and that would also won’t need any additional drivers or software. AirPrint-enabled printers can be found across a range of brands like HP, Canon, Epson, and Brother.

How to Add Printer on iPhone Using AirPrint:
- Check Printer Compatibility: First, ensure your printer supports AirPrint. Find this instructions in the printer’s manual.
- Connect to Wi-Fi: Make sure your iPhone and the printer are connected to the same Wi-Fi network. This step is crucial for them to communicate.
- Open the Document: On your iPhone, open the document, photo, email, or webpage you want to print.
- Access the Share Menu: Tap the share icon, which looks like a square with an upward-pointing arrow.
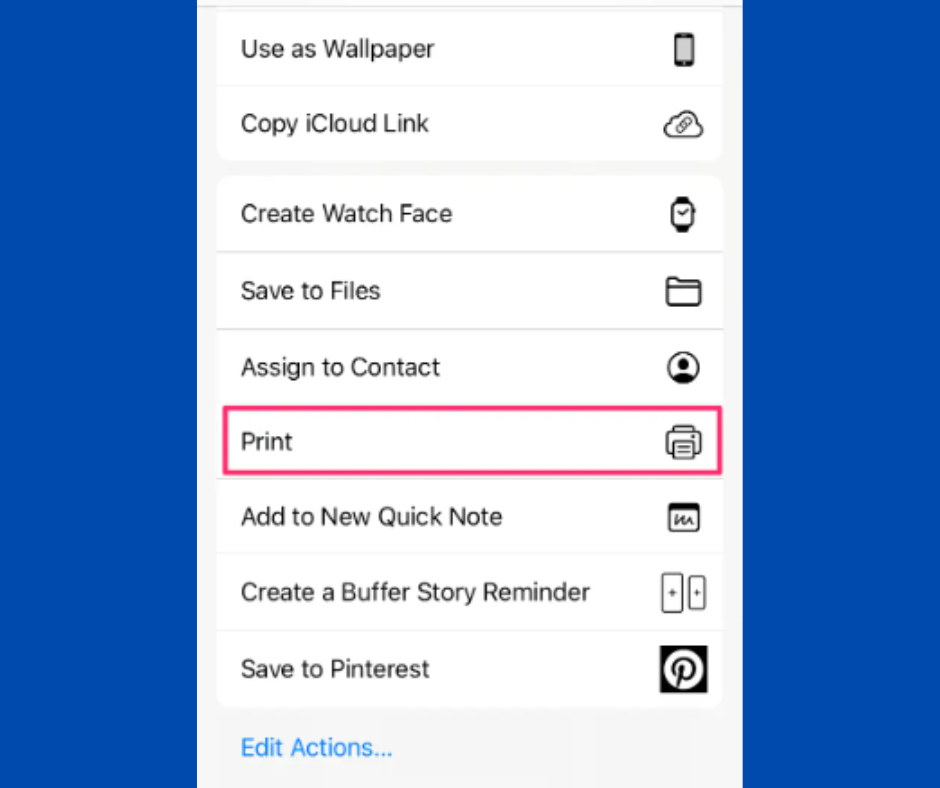
- Select Print: From the share options, select “Print.”
- Choose Your Printer: A list of available AirPrint-enabled printers will appear. Select your printer from this list.
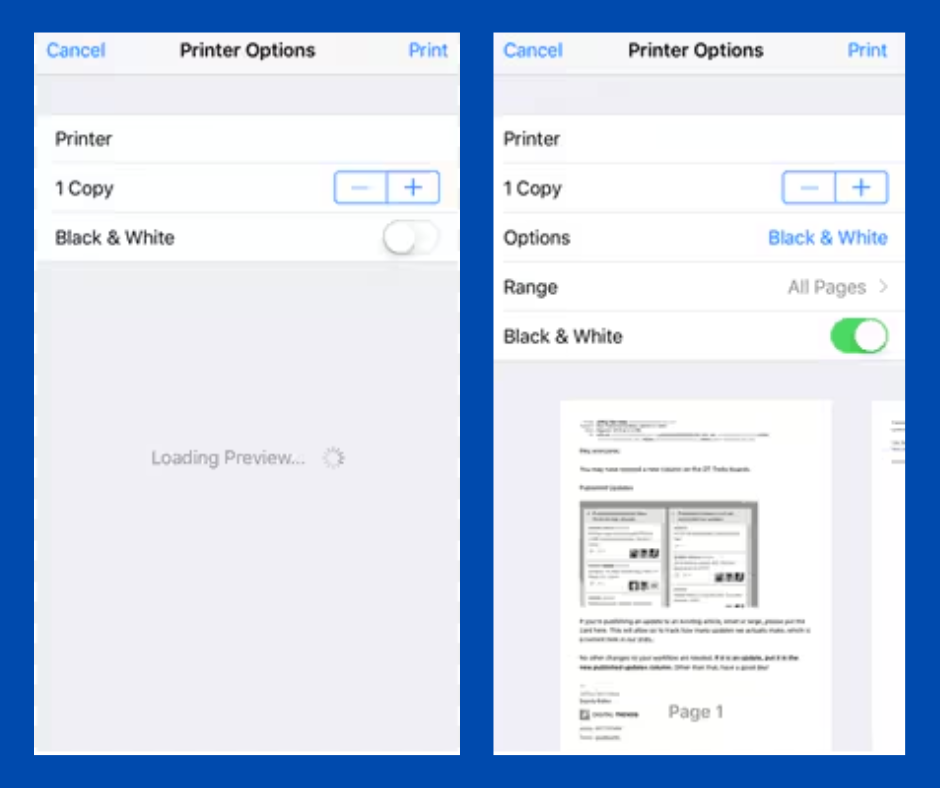
- Customize Print Settings: Adjust the number of copies, page range, and other print settings if necessary. The available options may vary depending on the document type and printer model.
- Print: Once you’ve configured your settings, tap “Print” in the upper right corner.
AirPrint is seamless and user-friendly, making it an excellent choice for quick, everyday printing tasks when figuring out how to add a printer on iPhone.
Method 2: Bluetooth Printing
What is Bluetooth Printing?
Bluetooth printing allows you to connect your iPhone to a printer wirelessly via Bluetooth. This method is ideal for short-range, local printing tasks and is suitable for personal use.
How to Add Printer on iPhone Using Bluetooth:
- Check Printer Compatibility: Ensure your printer supports Bluetooth. Refer to the printer’s manual or the manufacturer’s website for details.
- Enable Bluetooth on the Printer: Turn on the Bluetooth function on your printer. This usually involves pressing a Bluetooth button or navigating through the printer’s settings menu.
- Enable Bluetooth on Your iPhone: On your iPhone, go to Settings > Bluetooth and toggle it on. Now that will start exploring for nearby devices.
- Pair the Devices: Select your printer from the list of available devices.
- Open the Document: Open the document or photo you wish to print on your iPhone.
- Access the Share Menu: Tap the share icon and select “Print.”
- Choose Your Printer: Select your Bluetooth-enabled printer from the list of available printers.
- Print: Adjust any necessary print settings and tap “Print.”
Bluetooth printing is a handy option when Wi-Fi is not available or for quick, local printing needs, providing another solution for how to add a printer on iPhone.
Method 3: Wi-Fi Direct
What is Wi-Fi Direct?
Wi-Fi Direct allows your iPhone to connect directly to a printer without needing a wireless router. This feature is useful when you are not near your usual network or need a direct connection for faster printing.
How to Add Printer on iPhone Using Wi-Fi Direct:
- Enable Wi-Fi Direct on the Printer: Turn on Wi-Fi Direct mode on your printer. This process varies by printer model, so refer to your printer’s manual for specific instructions.
- Connect Your iPhone to the Printer’s Wi-Fi: On your iPhone, go to Settings > Wi-Fi. Select the printer’s Wi-Fi network from the list of available networks. You might need to enter a password found in your printer’s manual.
- Open the Document: Open the file you want to print on your iPhone.
- Access the Share Menu: Tap the share icon and select “Print.”
- Choose Your Printer: Select your Wi-Fi Direct-enabled printer from the list of available printers.
- Print: Customize any print settings and tap “Print.”
Wi-Fi Direct is excellent for situations where you need a quick and direct connection to your printer without involving a complex network setup, another great method on how to add a printer on iPhone.

Method 4: NFC Printing
What is NFC Printing?
Near Field Communication (NFC) allows you to connect your iPhone to a printer by simply tapping the two devices together. This method is quick and convenient but requires that both the printer and the iPhone support NFC.
How to Add Printer on iPhone Using NFC:
- Check Printer Compatibility: Ensure your printer supports NFC.
- Enable NFC on Your iPhone: NFC is usually enabled by default on iPhones. Ensure it’s active in your settings.
- Tap to Connect: Tap your iPhone against the NFC tag on the printer. This will initiate the connection between the devices.
- Open the Document: Open the file you wish to print on your iPhone.
- Access the Share Menu: Tap the share icon and select “Print.”
- Choose Your Printer: Your iPhone should automatically recognize the printer via NFC.
- Print: Adjust any necessary settings and tap “Print.”
NFC printing is one of the quickest ways to set up a printing connection, perfect for when you’re in a hurry and need to know how to add a printer on iPhone.
Method 5: USB Cable Printing
What is USB Cable Printing?
If your printer does not support wireless connections, you can still print using a USB cable. This method requires a third-party app that supports USB printing and the appropriate connectors.
How to Add Printer on iPhone Using USB:
- Check Compatibility: Ensure your printer and iPhone can be connected via USB. You might need a Lightning to USB or USB-C adapter, depending on your iPhone model.
- Download a Third-Party App: Install a printing app like Printer Pro or PrintCentral that supports USB printing.
- Connect Devices: Use the appropriate cable to connect your iPhone to the printer. Ensure both devices are powered on.
- Open the App: Launch the third-party printing app on your iPhone.
- Open the Document: Open the document within the app that you want to print.
- Print: Follow the app’s instructions to select the printer and configure print settings. Finally, tap “Print” to start printing.
USB cable printing is a reliable option when wireless printing is not available or practical, adding another method to your toolkit for how to add a printer on iPhone.
Troubleshooting Printer Connections
Occasionally, you might encounter issues when trying to connect your iPhone to a printer. Here are some common troubleshooting tips:
- Ensure Compatibility: Double-check that your printer is compatible with the connection method you’re using (AirPrint, Bluetooth, etc.).
- Update Software: Make sure your iPhone and printer firmware are up to date. Outdated software can cause compatibility issues.
- Check Wi-Fi Network: Ensure your devices are connected to the same Wi-Fi network.
- Restart Devices: Restart both your iPhone and printer.
- Reset Network Settings: On your iPhone, go to Settings > General > Reset > Reset Network Settings. This can help resolve network-related issues.
- Refer to the Manual: Consult your printer’s user manual for specific troubleshooting steps.
Specific Use Case: Adding a Printer to Square Point of Sale
For business users utilizing the Square Point of Sale (POS) app, adding a printer is a slightly different process. Here’s how to add a printer on iPhone for Ethernet and Bluetooth printers to Square POS.
Connecting Ethernet Printers to Square POS
- Check Printer Interface: Ensure your printer has an Ethernet Interface. Some printers come with interchangeable interfaces, so confirm you have the Ethernet one.
- Connect the Ethernet Cable: Plug one end of the Ethernet cable into the printer and the other into your wireless router.
- Open the Square App: Launch the Square app on your iPhone and navigate to More > Settings > Hardware.
- Assign the Printer: Select the printer from the list and tap assign to profile. A new printer profile can also be created or assign the printer to an existing profile.
- Create a Printer Profile: Enter a name for your printer profile and specify its use (receipts, order tickets, etc.). Adjust any necessary settings such as auto-printing options.
- Save the Settings: Once configured, tap Save to finalize the setup.
Connecting Bluetooth Printers to Square POS
- Ensure Power and Paper: Make sure the printer is charged and has receipt paper loaded.
- Enable Bluetooth: Turn on Bluetooth on both the printer and iPhone.
- Open the Square App: Navigate to More > Settings > Hardware.
- Create a Printer Profile: Enter a name for the printer profile and specify its use (receipts, reports, etc.). Adjust the settings as needed.
- Pair the Printer: Select Connect a Bluetooth Printer and follow the on-screen instructions to pair your devices.
- Test and Save: After pairing, return to the Square app and tap Print Test. Once confirmed, tap Save to complete the setup.
By understanding and following the detailed steps for various connection methods—AirPrint, Bluetooth, Wi-Fi Direct, NFC, and USB—you can ensure a seamless setup process. Additionally, specific instructions for integrating printers with the Square Point of Sale app can help business users optimize their operations. With these comprehensive guidelines, you’ll be able to print documents, photos, and more directly from your iPhone with ease, mastering how to add a printer on iPhone.
People Also Loved To Read – How to turn off answer phone on iPhone
For news updates, visit – Daily News 24×7

